
Introduction
How do I adjust the headlights is a common question when your low beams seem too high, too low, or uneven on the road. In most cases, what you really need is headlight alignment or headlight aiming—not a full replacement. The standard DIY approach used across major guides is to park on a level surface, face a flat wall or garage door, mark the beam centers, then check the beam pattern from about 25 feet (7.62 meters) away. Many guides also recommend doing this with properly inflated tires and around half a tank of gas so the vehicle sits at a more normal driving height.
If you have been getting flashed by oncoming traffic, struggling with night visibility, or noticing that one beam points higher than the other after a bulb or housing change, this guide will walk you through the process in plain English. It will also explain when a simple DIY adjustment is enough and when a damaged housing, a modern adaptive headlight system, or a legal requirement means you should stop and get professional help.
What Headlight Adjustment Actually Means
When people search for how to adjust headlights, they usually mean changing the vertical adjustment and sometimes the horizontal adjustment so the beam lands where it should. The goal is simple: you want enough road illumination to see signs, lane edges, and obstacles, but not so much upward glare that you blind other drivers. That is why most guides focus on adjusting the low beam headlights first.
On many vehicles, the main user-adjustable change is vertical aim. Some models also allow horizontal movement, while others are more limited. Ford’s support guidance, for example, specifically shows vertical adjustment with a Phillips screwdriver, while broader aiming guides note that horizontal adjusters may exist depending on the housing design.
Signs Your Headlights Need Adjustment
Your misaligned headlights usually tell on themselves. Maybe you can only see a short patch of pavement right in front of the bumper. Maybe the lights seem to shine into road signs or tree branches instead of onto the lane. Maybe other drivers keep flashing you even though your high beams are off. Those are classic signs that your headlight beam adjustment is off. AAA’s safety guidance ties proper aiming directly to safer night driving and reducing glare.
Another common clue is an uneven pattern after work has been done on the front end of the vehicle. If you recently replaced a bulb, swapped a housing, had suspension work, or installed a lift kit, the beams may no longer sit at the correct height. J.W. Speaker specifically notes that if a lift kit is added or removed, the lights should be aimed again.
Before You Start: Safety Checks and Setup
Before touching the headlight adjustment screws, get the setup right. Park on level ground facing a blank wall, garage door, or another flat vertical surface. The vehicle should be sitting normally, not nose-up on a slope or loaded down with unusual cargo. Fleetio recommends properly inflated tires and at least half a tank of gas to simulate standard operating conditions, while AAA says to remove heavy cargo that changes ride height.
This preparation matters more than many people think. If the car is tilted, underinflated, or heavily loaded, you can “correct” the beams to the wrong position and still end up with poor visibility or blinding glare. J.W. Speaker also advises aiming the vehicle at normal driving height, which is especially important after suspension changes.
Here is a quick setup table you can follow:
| Setup item | What to do | Why it matters |
| Surface | Park on a level surface | Prevents false aim readings |
| Distance | Use about 25 feet / 7.62 meters from the wall | Common reference distance |
| Tires | Inflate to proper pressure | Keeps ride height normal |
| Fuel/load | Keep around half a tank of gas and remove heavy cargo | Simulates real driving height |
| Lighting mode | Use low beams first | Low beams are the main aiming reference |
The 25-foot method appears again and again because it is practical for home garages and driveways, and it gives a consistent reference point for the beam cutoff.
Tools and Materials You’ll Need
You do not need a professional headlight aiming system for a basic home adjustment, but you do need a few simple tools. Most guides mention painter’s tape or masking tape, a tape measure, and a screwdriver or socket wrench depending on your headlight housing. Some technical guides also mention a laser level or chalk as optional helpers.
In simple terms, your tool list is:
- Painter’s tape or masking tape
- Tape measure
- Phillips screwdriver or the correct socket/tool for your vehicle
- A flat wall or garage door
- Your owner’s manual if you are not sure where the adjusters are
The manual matters because the exact headlight alignment adjuster location changes by make and model. Ford’s help page even shows brand-specific adjustment instructions rather than assuming every housing is the same.
Step-by-Step: How to Adjust the Headlights at Home
This is the main DIY method for how to adjust headlight alignment step by step.
1) Pull close to the wall and measure the center of each headlight
Park close to the wall first. Turn on your low beams. Measure from the ground to the center of each headlight lens, then transfer those heights to the wall with tape. AAA says to mark the center of each headlight on the wall, while J.W. Speaker describes drawing lines upward from the ground to create Y axis reference lines.
2) Mark your reference lines
Use tape to create a horizontal line that matches the measured headlight height. Then add vertical strips lined up with each lamp center. Some DIY guides use a simple cross shape. J.W. Speaker’s method is more technical and refers to X axis and Y axis lines, but the purpose is the same: create a clear target so you can see where the beam lands.
3) Back the vehicle up about 25 feet
Now move the vehicle straight back to roughly 25 feet from the wall. This is one of the most repeated measurements in the available guides. Super Bright LEDs says to back the vehicle a minimum of 25 feet away, and J.W. Speaker uses 7.62 meters (25 feet) as the aiming distance.
4) Check the beam pattern height
At this point, look at the beam pattern on the wall. Many DIY references aim for the top of the beam or the cutoff to sit slightly below the measured headlight centerline. Super Bright LEDs says the top of the pattern should sit at the 2-inch marks when you are 25 feet away. AAA also says the beams should not project too high, and another AAA-affiliated guide cites a standard of about 2.5 inches below the headlight height at 25 feet.
That means a good working rule for many vehicles is this: at 25 feet, the low beam cutoff should usually be a little lower than the centerline you marked earlier, often around 2 to 2.5 inches below. Since vehicles differ, your owner’s manual or OEM spec should win if it gives a specific target.
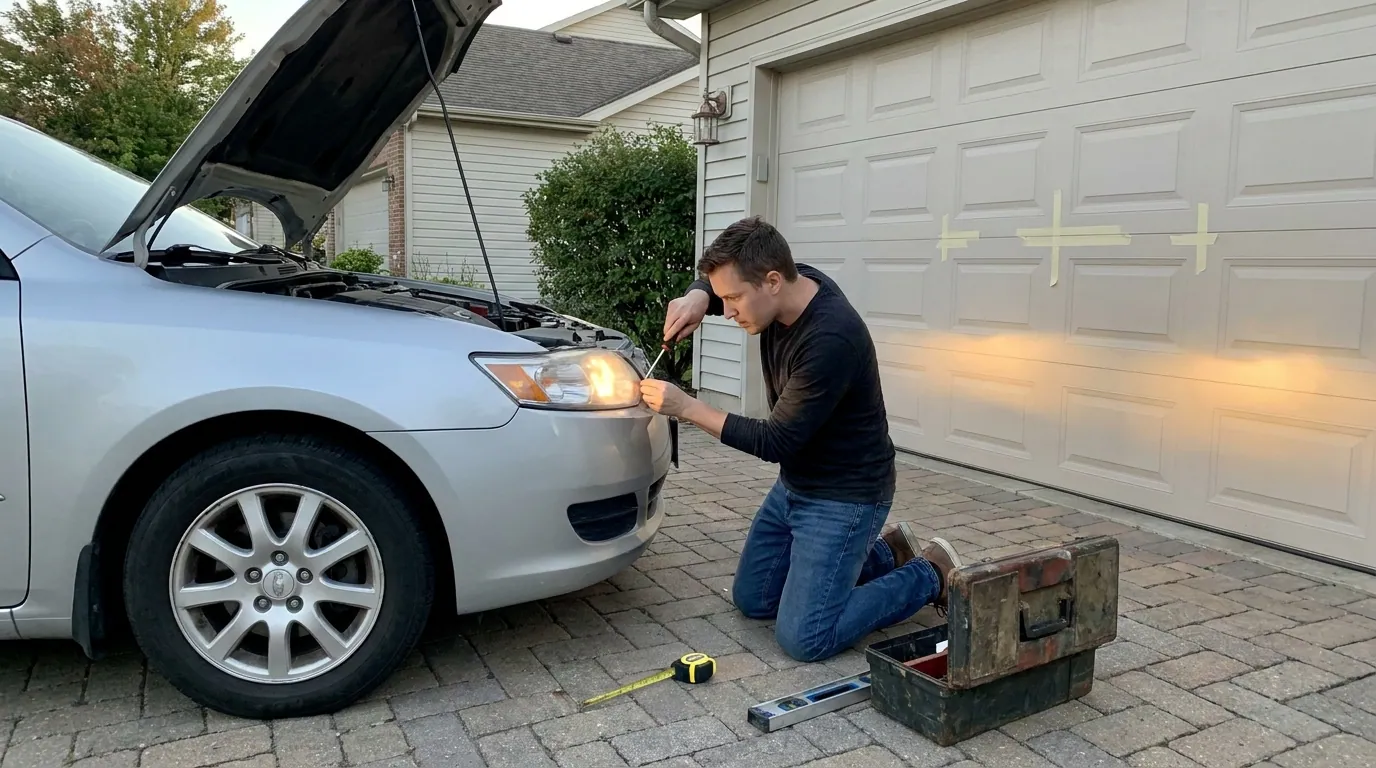
5) Locate the adjustment screws
Open the hood and find the vertical adjustment screw and, if present, the horizontal adjustment screw. These are often on the top or rear of the headlight housing. Ford’s support page says to use a Phillips screwdriver and turn the adjuster clockwise or counterclockwise to change vertical aim. An AAA guide also notes that one adjuster is usually vertical and the other horizontal.
6) Make small adjustments and recheck often
Turn the vertical adjuster slowly. The idea is not to crank the beam all over the place, but to make small moves and watch where the brightest part of each beam or the cutoff lands on the tape marks. If your vehicle allows horizontal aiming, center the beam left to right afterward. Fleetio’s process and J.W. Speaker’s instructions both support this careful, incremental approach.
7) Road test the result at night
After the wall test, do a careful night drive. You should see better lane coverage without excessive upward glare. If the pattern still looks wrong on real roads, go back and fine-tune. If it still refuses to look right, you may have a problem beyond basic aiming.
“Headlights must be securely mounted and properly aimed such that the beam pattern ‘cut off line’ complies with all applicable regulations.”
That line from J.W. Speaker gets to the heart of the process: correct aim is not just about convenience. It is about safe visibility and compliance.
Where Is the Headlight Adjustment Screw?
One of the biggest user pain points is simply finding the adjuster. On many vehicles, the headlight adjustment screws sit on top of the housing or behind it. On others, access is tighter and may require a longer tool. Ford’s help page shows a vertical adjuster method with a Phillips screwdriver, but exact access varies by vehicle.
If you cannot identify the correct fastener, stop and check the owner’s manual. Do not guess and start turning random bolts on the housing. Some are mounting fasteners, not aiming controls. That is one of the fastest ways to make the problem worse.
How High Should Headlights Be Aimed?
This is where many articles get vague, but the available guidance is actually pretty consistent. At about 25 feet, the low beam headlights should generally hit slightly below the headlight center height you marked. Super Bright LEDs uses 2 inches below, while the AAA-aligned guide quotes about 2.5 inches below at that distance.
So, if you are asking how high should headlights be aimed at 25 feet, the practical answer is: usually a little below the measured headlight centerline, not equal to it and not above it. That downward angle helps illuminate the road while limiting glare for approaching drivers. Because model-specific specs vary, this is a strong general method, not a universal law for every vehicle.
Low Beams vs. High Beams: Which One Do You Adjust?
In most DIY situations, you aim the low beams first. They are the reference beam for normal driving, and they are the ones most likely to create dangerous glare if pointed too high. Super Bright LEDs notes that on vehicles with combined low and high beam bulbs, adjusting the low beams may effectively align the high beams too.
If your vehicle uses separate systems, the high beams may behave differently. J.W. Speaker publishes separate guidance for high-beam aiming and low/high combination units, which shows that not every setup is identical. That is another reason vehicle-specific instructions matter when you move beyond a simple home adjustment.
Projector vs. Reflector Headlights
Not every beam pattern looks the same, and this confuses a lot of drivers. Projector headlights usually create a sharper beam cutoff, while reflector designs can look softer or broader. Super Bright LEDs discusses reflector behavior and how LED chip orientation can affect the pattern.
That matters because some people think their lights are misaligned when the real issue is the pattern design, the bulb fitment, or the housing type. If you swapped bulbs and the pattern suddenly looks scattered or uneven, the problem may be the match between the bulb and the housing rather than the aiming itself.
LED, Halogen, and HID Headlights: Does Adjustment Change?
The basic aiming process stays similar, but the hardware can change how forgiving the beam looks. Super Bright LEDs spends a lot of time on LED headlight bulbs, halogen bulbs, HID bulbs, and fitment details like H4, H7, H9, H11, H13, and 9005. It also notes that on some LED bulbs, the collar can rotate to improve beam orientation and that the light-emitting surfaces should sit correctly for the housing design.
This means that if you upgraded from halogen to LED and now the beam pattern looks wrong, turning the adjusters may not fully solve it. The issue may be the bulb orientation, the housing compatibility, or legality in your region. Super Bright LEDs explicitly warns that putting LED bulbs in halogen reflector housings for on-road use may not be street legal in the USA.
Common Headlight Adjustment Mistakes
The biggest DIY mistakes are boring but important: not using a level surface, skipping tire pressure, forgetting cargo weight, adjusting the wrong screw, and making huge corrections instead of tiny ones. Fleetio and AAA both emphasize setup because a bad setup creates a bad result even if the turning itself is technically correct.
Another common mistake is assuming every uneven beam is an aiming problem. If a housing is loose, a mount is bent, or the bulb is seated incorrectly, you can chase the pattern forever and never fix it. J.W. Speaker also notes that the headlight must be securely mounted before aiming.
What to Check if Adjustment Doesn’t Fix the Problem
If your beams still look bad after a careful adjustment, check the basics. Is the lens cloudy? Is the bulb installed correctly? Is the housing damaged from a minor bump or repair? Has the vehicle height changed because of a lift kit, cargo, or suspension work? Those issues can all make the beam look wrong even when the adjuster is set correctly.
This is also where professional help starts to make sense. J.W. Speaker recommends a headlight aiming system for proper alignment, and says to see a professional service provider if you are not familiar with the legal requirements.
When DIY Is Fine — and When You Need a Professional
A DIY adjustment is usually reasonable when your vehicle has accessible manual adjusters, the housing is intact, and you are only correcting a small aim problem. But if the car has complex lighting electronics, visible accident damage, broken adjusters, or a stubborn beam pattern that will not settle, professional service is the safer route.
There is also a practical side: Fleetio mentions a professional headlight adjustment cost and a DIY-vs-shop comparison, while J.W. Speaker warns that improper aiming can lead to tickets or citations under local rules.
Legal and Regional Notes
Lighting rules are not identical everywhere. J.W. Speaker distinguishes between LHT (Left Hand Traffic) and RHT (Right Hand Traffic) patterns and references DOT Regulation and ECE Regulation contexts. That matters because beam shape and legal expectations can differ by market.
For most everyday drivers, the takeaway is simple: follow your vehicle manual first, use a conservative low-beam aim, and get expert help if your vehicle has a special lighting system or local inspection rules. That is safer than relying on a generic trick from the internet when your car may require something more specific.
FAQ
How far should headlights be from the wall when adjusting?
A common DIY reference is about 25 feet from a wall or garage door. That distance appears across Fleetio, AAA, Super Bright LEDs, and J.W. Speaker.
How high should low beams hit at 25 feet?
A practical target is slightly below the headlight centerline, commonly around 2 to 2.5 inches below depending on the reference used. Check your manual for exact specs if available.
Can I adjust my headlights myself?
Usually yes, if the adjusters are accessible and the housing is in good shape. If the system is electronic, damaged, or legally sensitive, professional aiming is better.
Do I need to adjust headlights after replacing bulbs?
Sometimes, yes. It is smart to recheck the pattern after changing bulbs or housings, especially if the beam now looks uneven.
Why is one headlight higher than the other?
It could be simple misalignment, but it could also be an installation issue, a damaged mount, or a housing problem. Check the bulb seating and housing condition before assuming the screws are the only fix.
Final Words
If you have been wondering how do I adjust the headlights, the safest DIY answer is to use a level surface, measure and mark the beam centers on a wall, back up about 25 feet, and make small corrections to the vertical adjustment first. In many cases, that is enough to restore better night visibility and reduce glare for other drivers.
But do not force a DIY fix when the real issue is a damaged housing, bad bulb fitment, suspension change, or modern electronic aiming system. A correct headlight alignment should improve what you see without making life worse for everyone coming the other way. That is the standard worth aiming for.
Disclaimer: This content is for general informational purposes only. It is not professional mechanical or safety advice. Always follow your vehicle’s owner manual or consult a qualified technician before making adjustments. Improper handling may affect visibility, safety, and compliance with local regulations.